Sunday, September 6, 2015

Girlie T-Shirt Modification

Ha ha! It sounds like a The Big Bang Theory title, but this post is about a very practical and recurrent process to transform one regular t-shirt into a piece of clothing that actually fits us girls better. I love collecting my favourite bands' merch, but too often they do not have the girlie version, so I have to customize it.
I think that the pictures speak for themselves. We must use a jersey neddle in the machine and sew the seam with a very narrow zigzag for elasticity. Next to this stiching, we will make a wide and short zig zag, and we will cut the seam allowance reeeeally close to it. In that way we will have something similar to the job done by sergers, only we have to make it in three steps instead of one.

For the sleeves and bottom hem, we will roll the fabric towands the inside twice (1.5 cm each turn), and we'll machine-stitch it with a jersey double needle.


Finally, we'll remove the original t-shirt's neck and sew it again in place but in a deeper cut line. We will place the neck elastic band in the inside, under the folded neckline. We will machine stitch it with the double needle too.

And do not forget the ironing in every step.
This procedure is the same I use to adjust my boy's t-shirts when they are too big, minus the neck adjustment.


Black and White Outfit

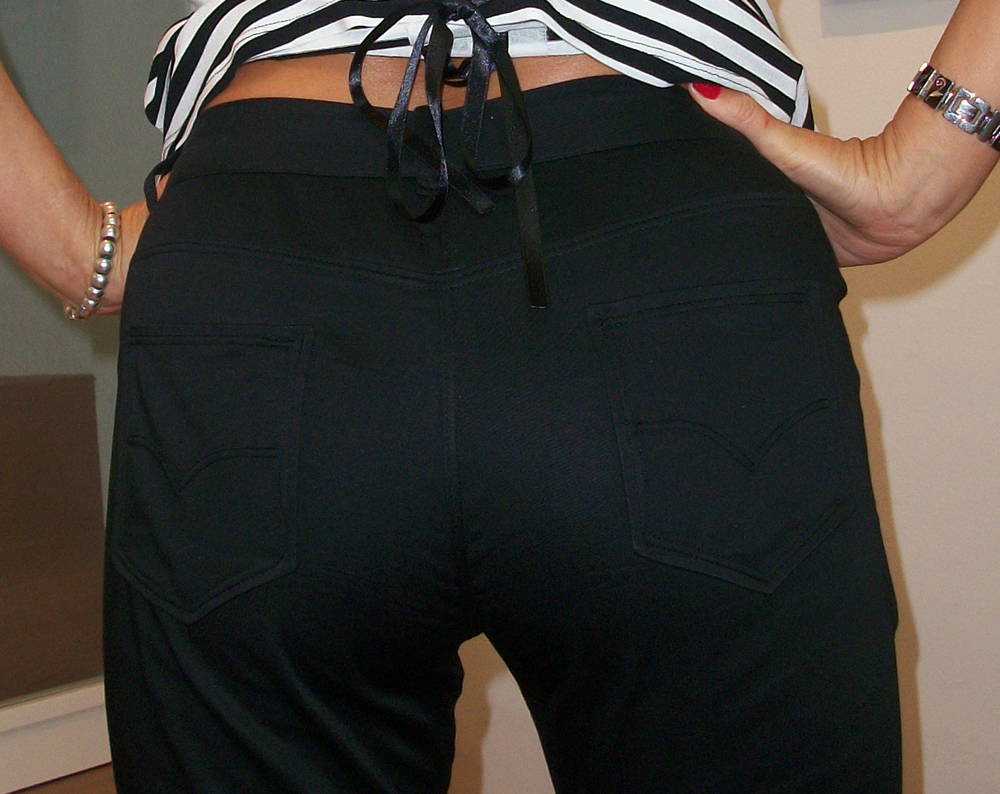
My last two projects go so well together that I decided to make an official outfit out of it, but in fact they are different in every sense.
The fabric for these capri pants has been in my little stash for a couple of years waiting for its turn. It is a cotton sateen with some elasticity that I bought in one of our trips to Leeds, in the city market. Suddenly I realized I did not have any capri pants and I think they are wonderful for summer, spring and early fall. I love how capri pants make our shoes more visible and sexy.
I used my own pattern for these, pants' fitting being too delicate to be toying around with new experiments. Since this was elastic fabric and I wanted a tight result, I took a couple of cm off in both sides of the pattern, from the crotch downwards. It resulted too much at the first fitting and I had to adjust and try, adjust and try for A LOT of times before I got the perfect fit. I also took 2cm (x4) off the waist of the pants to make them really tight. 
After so much trial and error, I could not even record the new pattern, because every fabric has its own give into it, and I will have to adjust the basic pattern in future projects as I did with this.

I discovered the double needle for the self bound seams I always make in pants, and I made a very good job with the zipper construction following Armstrong's instructions.
The result is almost perfect,maybe a little too tight in the waist department. I cannot gain another gram if I want to wear them comfortably, hehe...


As for the top, I used some remaining viscose from a previous project, but the fabric was scarce, so I had to include a seam in the centre back. After sewing it at the machine, I realized (my boyfriend did, in fact) that the stripes were not well-matched and it was almost impossible to undo the stitching, so I decided to take it to the haberdashery to have some metal eyes installed, and pass a black ribbon to try to hide my mistake. It is also a nice detail enhancing the top, I am really happy with it. 


Again, I used the double needle for the seams around the neck and armholes, which are rolled in themselves 1 cm. This ending in fabulous because it looks nice, it is quick, and it has elasticity like the fabric.


Thursday, August 13, 2015

Menorca Dress

We sewers-bloggers always explain three processes when we report a new project:

  1.  How did we get the fabric
  2.  How did we make the pattern 
  3. How did we get the inspiration (which often comes along process 1 or/and 2) 
Well, this particular project was ignited by the fabric. I was on holiday in Menorca (wonderful, wonderful island), which is quite close to the place we live: inland Catalonia, we have planes in summer which fly straight there. We spent some days in Ciutadella and some more in Maó, and I explored the fabric shops in both of them. Curiously, all of them had some of the same stuff, you know, being an island... but I found one that was particularly well assorted and its owner very nice and knowing of her product. She understood my need for natural fibers at once and helped me find the perfect fabric: an embroidered white cotton. And it was the end of the bolt, so I got a very good price too!
It was only 1.2 x 1.15 m, and it had an alongside embroidered border that I wanted to save for the dress hem. 
The fabric brought the inspiration, I was not in Ibiza, but very close to it, and I had a small piece of white cotton, so I started to think about the dress I would make.
Back home I had this old summer dress, so old I only wear it around the house, comfy and becoming, so I decided to rub it off.
After rubbing off the bodice and having a fitting session with it, and saw it was small at my boobs (which I had compensated, 20 years before, by elongating the back???!!!) Curiously there was too much fabric in my upper chest, so I remembered Karen's words and decided to make a FBA, which worked wonders:

For the skirt of the dress, I folded the dress by the back zipper (its only seam all around), and after securing it with pins, I placed over the bias-folded fabric, and cut.


I saw the dress was resulting too sheer, so I ripped and old white cotton dress, and used the fabric for an underskirt, The bodice I made it double, using the inside one as facing.

For the bottom hem, I cut the embroidered detail to the thread's rim, ans stitched to the skirt bottom with an embroidered stitch my machine has:


The result is wonderful, I am really happy with it. Comfortable, cool and becoming to my summer tan.


Tuesday, August 4, 2015

Jersey Sundresses: Not One But Two

Together with the fabric for my Coco dress, I bought two more jerseys in Praha last year. After seeing that 1mx1.5m is not enough for sleeves or anything fancy, I decided to use them to make two sleeveless dresses for my summer travels. I just finished them on time to put them in my Menorca suitcase, but my camera broke in the plane just before landing, and I could not take one single picture with the dresses on in jaw-dropping beaches (<3 Menorca!)


The pattern for the dresses is a variation off my CocoDress pattern, following the instructions in Aldrich's book for the Stretch Dress on pages 166, 167. I did not make the front panels though, neither the waist shaping.


With this project and the previous one, I used the lazy ass method: I cut the fabric two cm from the paper pattern, and sewed it 2cm from the edge. I had modified the skirt to perfection with the Coco, so here it was perfect at first trial.

To sew the seams with a jersey fabric like this, I use a zigzag stitch with very very small width, it seems a straight line to the eye, but it has got elasticity. Next to this stitching line, I zigzag again with wide stitches, and cut the seam allowance just after the zigzag to imitate the overlock. Finally I press the small seam allowance to the side.


For the bottom hem, armsythes, and neck line, I simply rolled the seam allowances inwards twice (1cm each roll), pinned it and machine stitched them with the double needle. The result is perfect.


Monday, August 3, 2015

Coco Dress Knockoff


Tilly is an inspiration to us sewers, and her patterns are a success around the world. Specially the Coco Dress, a design for jersey fabric, an easy project for beginners that results in a very versatile, comfortable and becoming dress. 
Inspired by it, I decided to make my own pattern using Aldrich's book and its Close Fitting Bodice Block for Less Flexible Jersey fabrics, pages 164, 165. I already used this pattern in two previous projects: Liberty Wool Dress and the Black Lace Back Dress. Making your own paper patterns might seem arduous work, but it saves you money and time, specially when you use the same block again and again.
I bought the jersey stripped fabric in a Praha shop last summer, but I only bought 1 metre x 1,5 m wide and I could not make the sleeves out of it. I was lucky to have a purple jersey in my stash, and the contrasting sleeves make the dress more lively and fun (Phew!!)
I observed Tilly's Coco closely and tried to imitate the evasĆ© line of the skirt. Parting from the waist of the pattern, I drew an opening line (10 cm at the bottom) and a curved hem line. I also added a boat neck line, which I redid after fitting the actual dress. 
And that's it. Easy peasey! I own no serger, So I zigzaged all the seam allowances and cut them at 0.5 cm, to try to imitate the serger (this is an imitation game, hahaha!)
The dress bottom and sleeve hems were rolled and machine-stitched with a double needle. And the neck as well. I used different width double needles. 0.6 cm for bottom hem and sleeves, 0.4 cm for the neck.
The result is brilliant. I planned to include pockets in contrasting fabric (=sleeves) to complete the dress and although my stylist said no, I still have doubts. What do you think?


Monday, June 29, 2015

Mad Men Dress


Betty is a hell of an inspiration for a lot of us, isn't she? Specially at the beginning of the series, still submerged in the 50s, with the American Look...because let's face it, those 50s dresses are eye candy for a sewist, aren't they? Crinolines, great silhouettes, structural rods, wonderful natural fibers dresses...
Gertie is such a sewist, and in her new book presentation, I peeped a sketch that hooked me. It is a Carolyn Schnurer red dress, a designer exemplifying the American look:


Isn't it just perfect?
On the other hand, I have been fantasizing with a red cherry fabric since I saw some in a street market in The Netherlands and I did not buy it. I have been dreaming about it for years! Finally I had a suitable project for it, so I bought it from the Fabric Godmother. It was very expensive, but the fabric is worth it: solid, good old cotton for a classic dress.
I had the clear idea of doing my own pattern. This is a tight design, and it had to be constructed to my exact measures and tastes. I consulted Armstrong book, and found a section  about strapless bodices. It has a bodice foundation that is exactly as the one I used in my previous project, with a dart under the bust that combines bust and waist darts (if you have the book at hand, it is on page 475). 


So, I followed the indications to make the necessary adjustments, added some halter straps, and made it into a muslin for a perfect fit. I only had to enlarge the bodice 2 cm at the waist, as for the rest it was so perfect it fitted me like a globe. So it was good to cut the fabric. I cut it double to use one as facing and lining.


Meanwhile I was planing my skirt... circle skirt? half circle? pleated? what kind of pleats? gathered? After cutting the bodice I had three skirt lengths left, so I sewed them together and finally decided to pleat it. I did some research about 50s pleated skirts, and chose box pleats, starting in the middle front and going around to the centre back. 
I applied fusible underlining to the whole bodice, stitching both bodices at the upper part and straps. After turning it over, I pressed and pressed and machine-stitched some channels for plastic rods at the sides and back panels.
Then I attached the pleated skirt to the bodice and machine stitched it closed. I put a long zipper at the centre back and finished the skirt: hem is rolled and machine topstitched.
I added the tulle crinoline I had from a previous dress, and the result is stunning, and yet wearable and comfortable enough to sit through a 5 hours family lunch, where I had massive success, hehe... one of my best projects, it is perfect and really special.


Wednesday, June 24, 2015

Liberty Dress

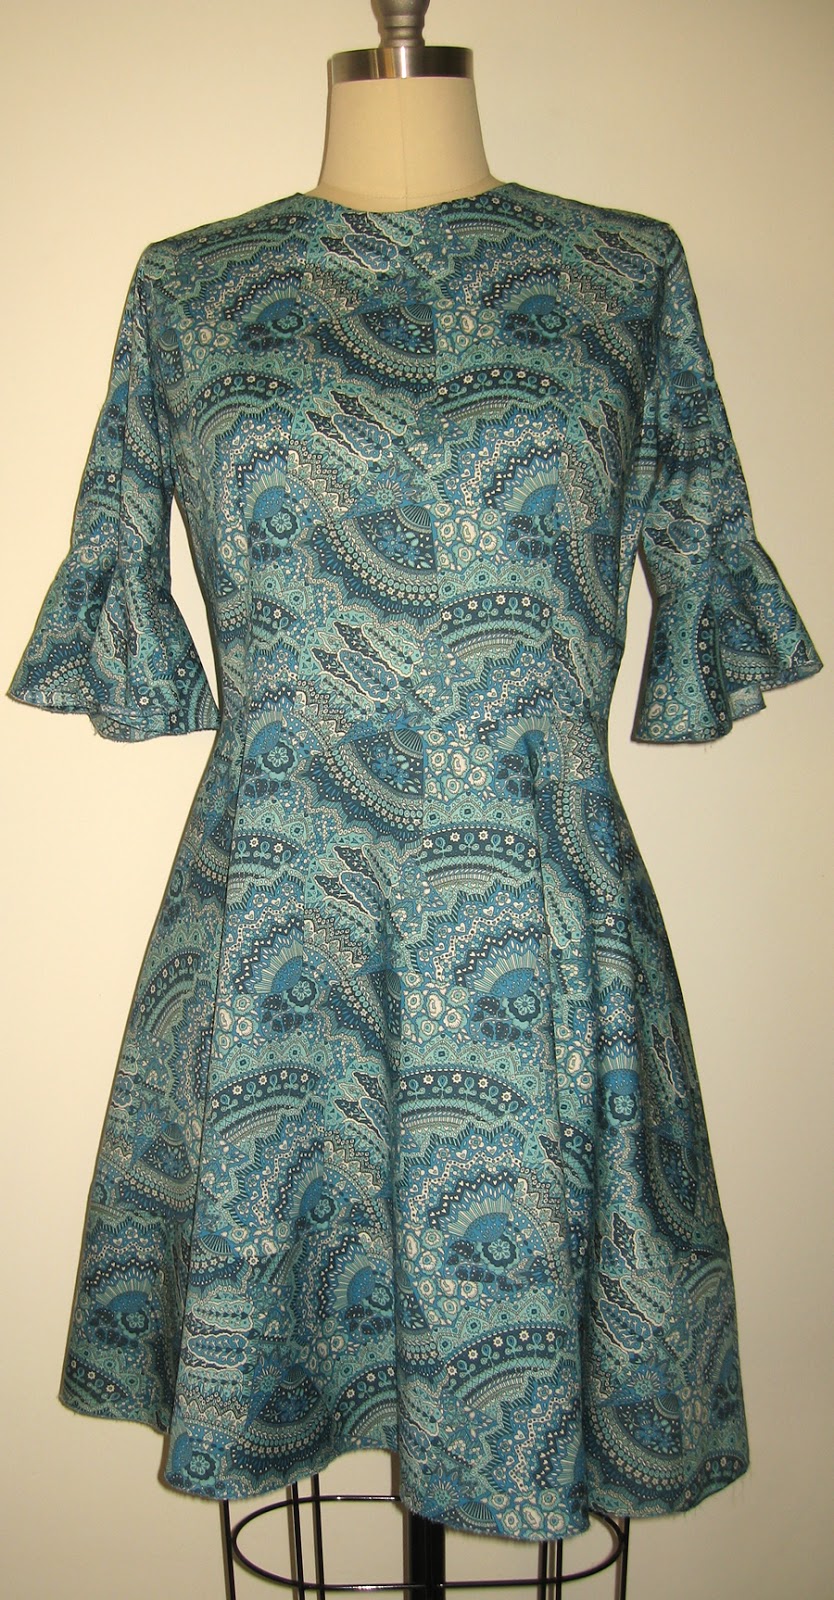
This project was inspired by its fabric (2m x 1.35m), of course. Karen in her blog explained about Liberty Tara Lawn cottons and I decided that I absolutely needed a dress made of it for my holiday this summer. I ordered from Liberty's and it cost me 80 Euros with shipping costs, but it is a wonderful fabric. The only drawback is that some patterns, like this one, are in fact repetitions of a small illustration, and the overall effect  is a little bit weird, so be careful to see the whole picture before you decide among the mountain of possible patterns they offer. Everything Karen said is true: it is a very thin fabric but it does not show though. It is a sweet cotton, wonderful to work with, and it barely wrinkles. I think it is completely worth it.
I was in love with this pattern at first sight, and I thought it would render beautifully with my Liberty cotton. It is from Patrones magazine, which we can buy in Catalunya. I am lucky enough to have it in the library bus that visits us every month.
I copied the pattern to the muslin, which was necessary in this case: expensive fabric+ new pattern. In the first fitting I saw that I need to lengthen the waist and modify the pattern for large bust. I followed the instructions in Armstrong's book:


The modification was successful. In the past, I would have used a bigger size, or added some fabric at the side seams or even in the back zipper (OMG!!!), wherever I could get some extra space for my big boobs, haha... but of course that means you loose the equilibrium and right proportions in the rest of the bodice.


Another process I learned along this project (man, I am on fire!!) was the invisible zipper application. I only had to buy a special leg for the sewing machine and watch a video in the net. That simple. Problem is, my zipper is not invisible at all. I think it is even beautiful in this design, but I really have to know how to make it disappear.


The sleeves a seamed in the middle and were perfect at first fitting. Good! I love perfect sleeve caps. I had some doubts with the flounces at the sleeves, design wise, but my image advisor said they were nice, and in fact I think they add some movement and life to the design.

I also took special care with the neck. I applied some fusible interlining to the facing, and machine stitched it to the right side of the dress, following the interlining as a guide. I trimmed carefully the hem to 0,5 cm and cut slashing lines to the stitches. Then I pressed it upwards and stitched the facing to the hem allowance. When I turned it down, the curve of the neck was just perfect. I secured it to the dress with a picking stitch.


I have some doubts about the inferior flounce. Although I like it being almost invisible, as an extension of the skirt, it is more visible in the magazine design. This might be due first to the different hemming method. I simply zig-zagged the bottom of the dress and left it raw, instead of making a small double folded hem which would have added flare to the flounce. 


I decided to encase all the seam allowances in themselves and topstitch them, since the thread is invisible in this pattern. That makes the dress perfect outside and inside, and easier to iron after washes.


I premiered it for a special occasion and received several compliments, both for the dress and for the fabric. I felt like a princes with that light and beautiful fabric flying around me, and after a long day of working with kids, sitting with them on my lap, the dress had barely a wrinkle.