Showing posts with label Chanel jacket. Show all posts

Sunday, April 17, 2016

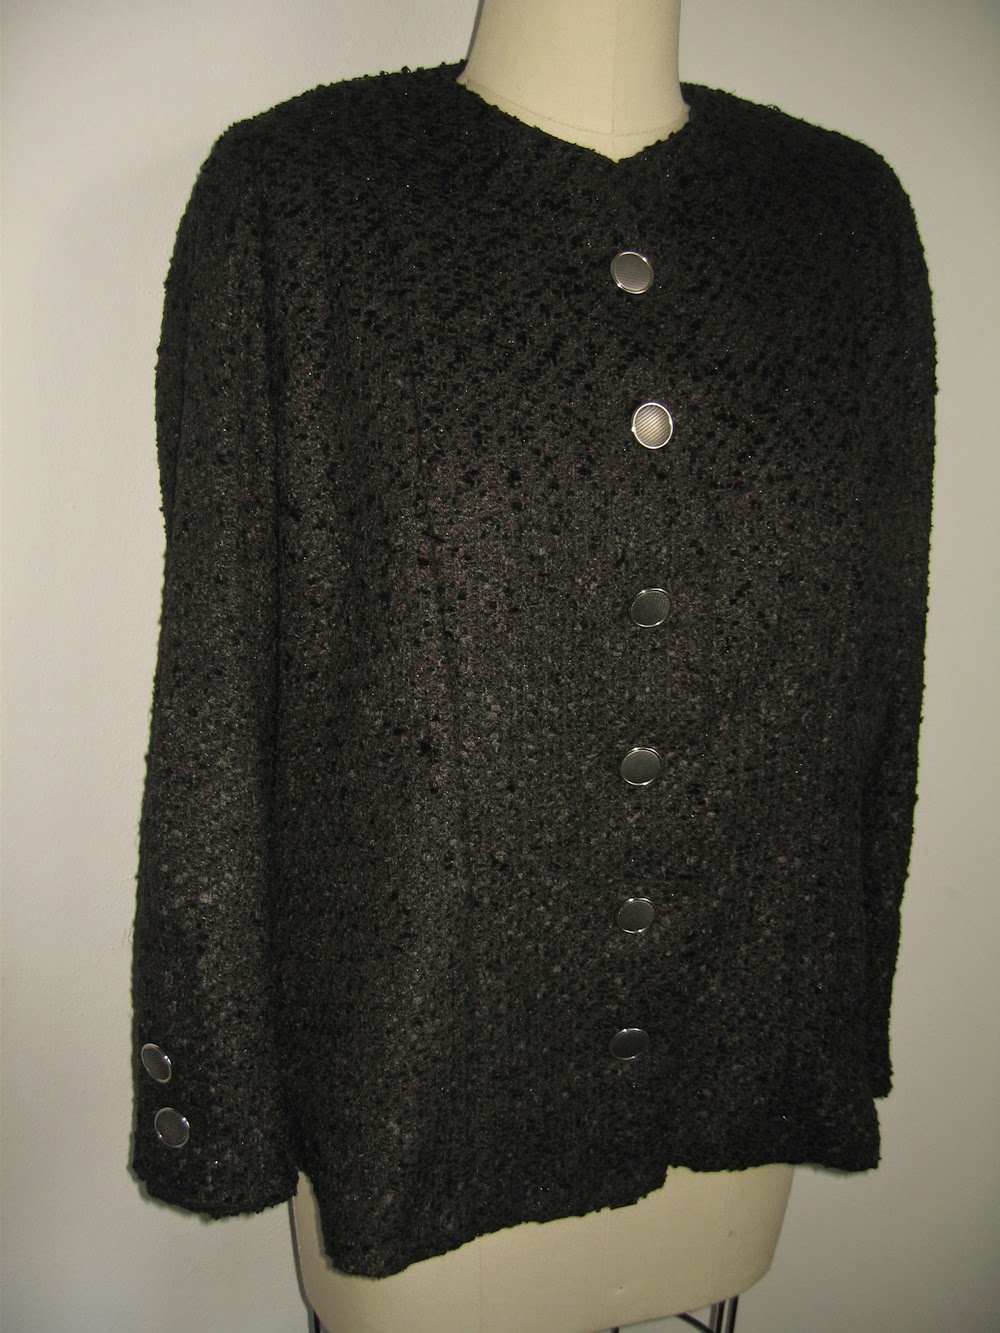
Linton Wool Couture Jacket


Hello!
This is my second cardigan couture jacket, Chanel style. 
I just wanted a black one to go with everything. And it does, I would wear it everyday.
I used the same pattern and method of construction than for my first one, which was a total success. Let's review some of the steps. 
Patterns do no include seam allowances and are transferred to the fabric (folded, so we get two of each) by tailor tucks.
We interline the front panels and sleeve bottoms (I use fusible interlining to make my life easier).The lining pieces are quilted into the fabric pieces of bodice and sleeves with the machine.
We assemble the pieces together basting them first. 
Then we machine stitch all the seams, we remove the basting thread and press seams open. I applied some silk strips in the shoulder seams to hold their shape.
Sleeves are sewn to the bodice by hand, using a backstitch, after gathering the cap tops with basting thread, ironing them round and basting them to the bodice.
 Bottom hems are handsewn to the jacket.
The lining pieces are handsewn together, I use a ruler under the sewing to avoid catching the fabric underneath. 

I even copied the trimmings, this time using some velvet ribbon in the middle of a wool unpicked strip. This is made by cutting a strip of the same fabric as the jacket and removing the woven threads all along it, leaving only a solid cm at the middle, on top of which we sew the ribbon. It is then applied to the jacket by hand.
 
I applied a plastic silvel zipper at the front and two at the sleeves bottoms, surrounded also by trimming.
This time I used real wool from Linton (1.5m), which I selected from some swatches they sent me. It is absolutely perfect, soft, heavy, with great structure. I used black silk for the lining.
Pockets are lined also in silk, and handsewn to the front of the jacket. They are so practical for keys, card, some change... to rush out and survive, as Coco herlself imagined.
And that is a perfect Chanel jacket!

Friday, April 3, 2015

Linton Wool, Chanel Style

 Hello!

I wanted to have another Chanel style jacket, after the success of my first one, and I bought this black wool at Linton. But then I changed my mind and decided to use it for my mother in law, Teresa. She deserves it!
I followed a mix of advice from Shaeffer and Kalhje: silk organza as interfacing, silk lining, some fusible interlining for buttonholes. 
First of all, I decided to use Claire Shaeffer's pattern for Vogue. I have her book on jacket construction, and I did not feel like drawing the pattern myself. Ignorant me thought a commercial pattern would be better. WRONG. In the first place, the sizes are too big, so I directly made a size down than Teresa's measures indicated (Ralph Rucci's coat experience).
 After the muslin fitting and adjustments done, I still don't like the sleeve heads, the side panel is ridiculously small, sleeves are very short and I hate the buttons placement in the front and the sleeves. It was 25 euros for nothing. 


Well, after the first mistake (acknowledged), I went on to cut the organza pieces using the slightly modified muslin pieces. And then I used the organza pieces to cut the fabric pieces themselves. I learnt this method in Susan Kahlje's course in Crafsy. It consists of machine sewing the interlining organza to the fabric, aiming to mark it and to prevent it from shape shifting. I used a pale colour organza to make it easy on my eyes.
When I had all the pieces attached to their interlining, I started to baste the pieces together for the first (real fabric) fitting, which proved the sleeves where too short and poorly shaped at the back. I tried to repair that by moving them inwards in their back part. I also made a modification for a curved back that consisted on a dart in the center of the neck (interlining), eased with the iron in the fabric.


After assembling the sleeves, with opening and buttonholes, I applied the silk lining and finished it completely, sewing it by hand all around the bottom of the sleeve and the last remaining seam.


In this last picture we can also see how I quilted the sleeves to the lining, as characteristical in Chanel jackets. Then I basted the sleeves to the jacket and made all the modifications fitting the jacket to the model. I finally sew the sleeves permanently by hand back stitching them. 
The next step was basting all the hem, which goes around the neck, front and bottom of the jacket. 


Once basted, I proceeded to hand sew it with a feltstitch. I also secured the seam allowances open here and there, to prevent them from messing up.
All this with a good pressing every now and then.


In this pic we can see the use of shoulder pads, and sleeve heads (as explained in this Thread's video). I do not see any dramatic improvement with the last.


I decided to make the buttonholes by machine. In the lining, I made coat buttonholes calculating precisely where they went.
Finally I machine sewed all the lining pieces, and pinned them to the jacket as it stood in the mannequin wrong side up. I made a major change here regarding Shaeffer's method (and classic Chanel): I did not quilt the lining to the fabric. I thought the stitching wouldn't look nice in the black wool fabric, and I also dreaded the days and days of delicate hand sewing that this method requires. So, I made a feltsitch to secure it to the jacket, removed all the bastings and...  voliĆ”!