Showing posts with label home sewing. Show all posts

Monday, August 15, 2022

Tie-Dye Double Gauze Long Summer Dress


A new fabric shop opened in the town I do my shopping, and I went to check their cargo, following a friend's advice. This is the only fabric I got, planing to make some long shirt with an old pair of jeans I had cut. 

The two blues did not go well (and that is the 2nd chance for the old piece of jeans), but I then had some inspiration! I decided to copy an old long summer dress I had trown away after years of service last year, and I had missed at the end of the school year, when it is very warm but you still want your legs covered. 


Well, all in all, I tried an old bodice pattern, but it did not meet my standards at the dress form, so I decided to drape the fabric on the form and that's it. The fabric is light and soft to the touch, but at the same time it has lots of body and retains shape, no drape almost when hanging. Perfect to drape it over the dress form. 


I failed at the 1st trial, because I took the princess lines as a good point to place the shoulder straps, but it was totally off. So, in the 2nd attempt, I placed them just next to the shoulder rim, where my real shoulder and arms are supposed to protrude from.


This fabric is gorgeous to the touch, and I had a great time sewing the neckline facings and shoulder straps.


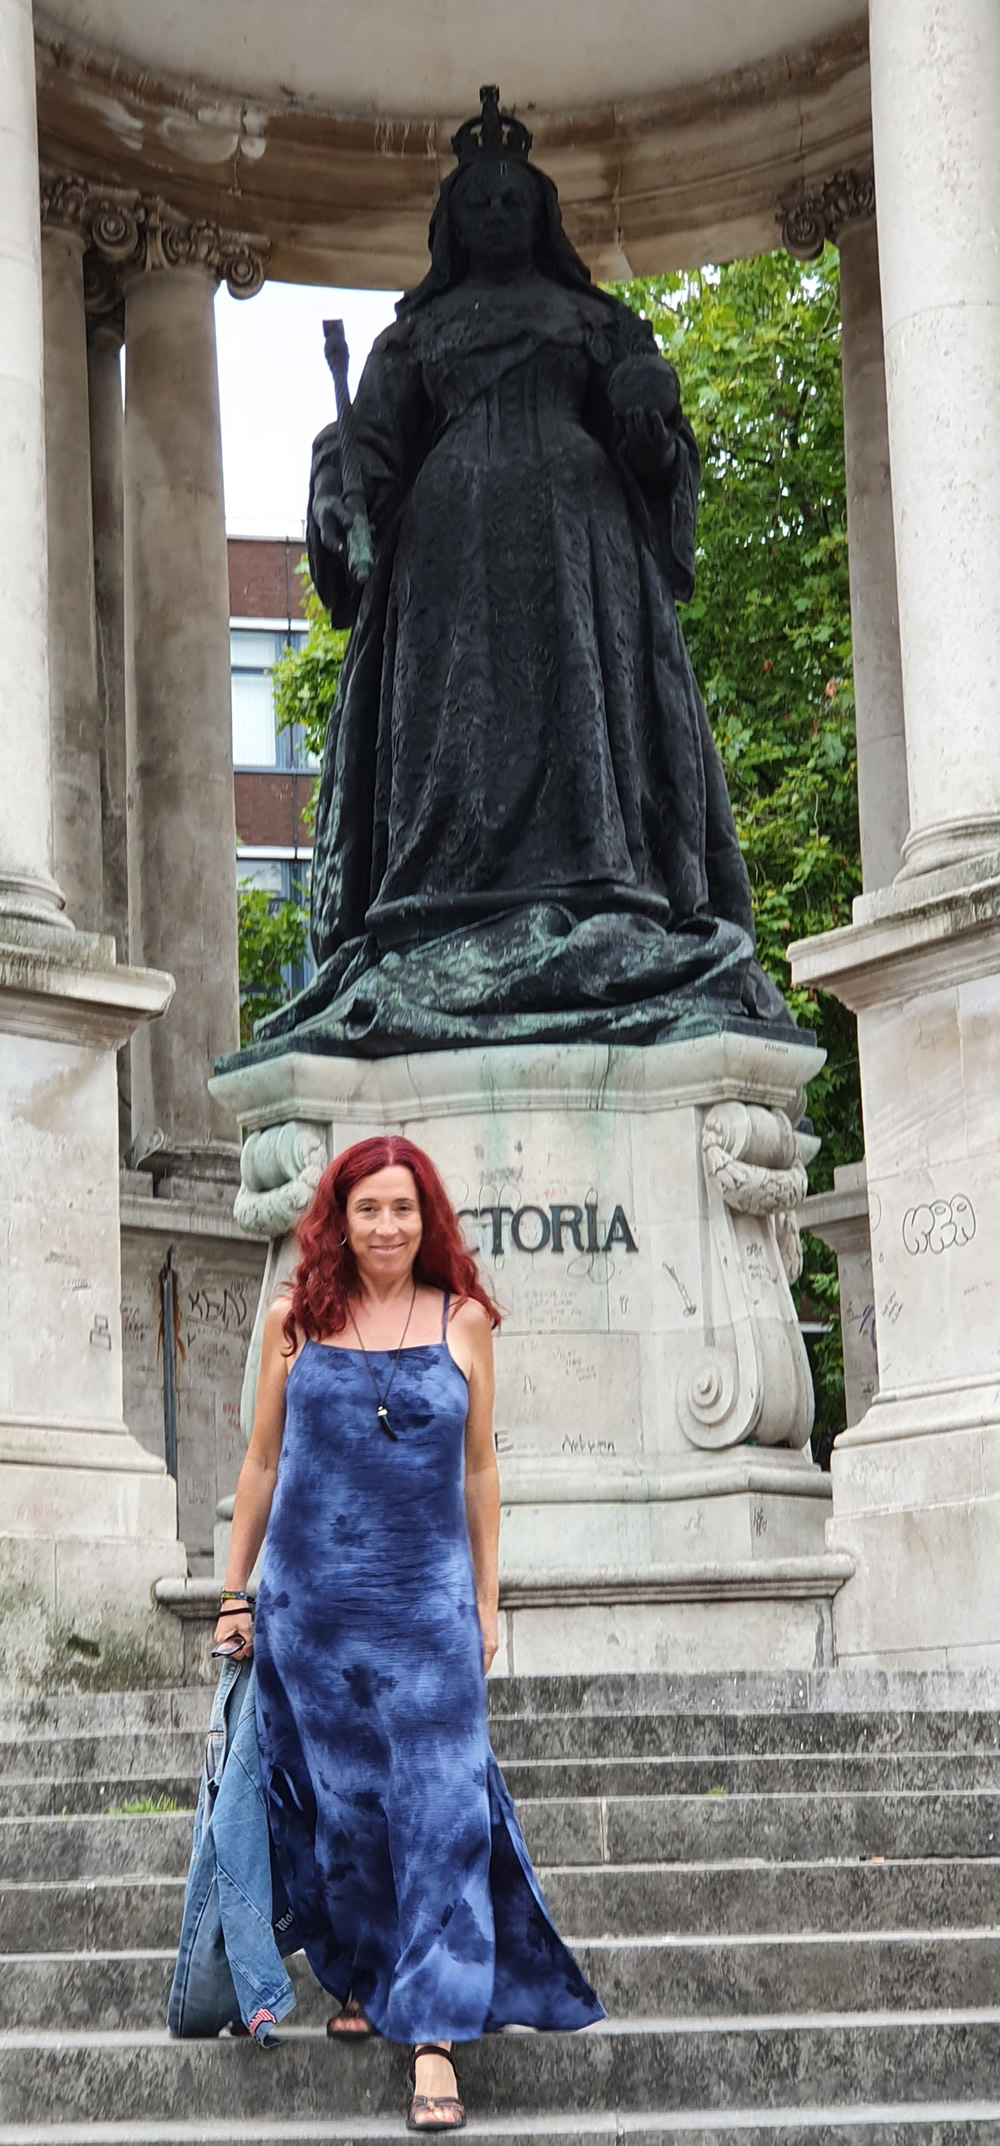
I sewed this the three days previous to our trip to Liverpool, because suddenly it was the dress I absolutely needed to fly and to wear in England, to be worn with a summer jacket or raincoat. 


These pictures are after driving 2 hours, flying 3 hours and going by train 2 hours more! And look how gorgeous this cotton looks at the end of the day. Good fabric!

Sunday, July 24, 2022

Green Cotton Midi Dress


I found this beautiful cotton fabric in a shop in Sitges dedicated to patchwork. One must visit these patchwork shops from time to time, because they can have beautiful cotton fabrics that can be used for dressmaking as well. 

This particularly is a Kaffe Fassett design and it got my eye at first sight. I bought 2 m (it is only 150 m wide) and I am glad I did, because when its turn arrived I had this midi dress fever, after seeing midi dresses everywhere. 

Having no tan at all, and also I had to wear this dress up the stage to give my graduated students their diplomas, a short skirt is not becoming when seen from bellow, so a midi dress was what I needed. 


The inspiration for the pattern came from Named Taika Blouse dress, but I wanted to use my old patterns and some hacking to get there. After the modifications I made for my previous midi dress, I just had to shorten the sleeves, draw a V-neck line and a centre front partition with the matching 2 cm button stand that continued up to frame the V-neck opening and the back of the neck. I also gave some give to the side seams (4 cm total), because the previous midi dress was quite tight and since this was buttoned at the front, I did not want it to gap between the buttons. 


I am really proud of this one, the result is perfect. I wore it the last  day of the course and I felt perfect for the walk we did in the morning and for the ceremony at the end of the morning. It is going to get quite a lot of wear, it ticks all the boxes, specially for spring and autumn.


Friday, April 3, 2015

Linton Wool, Chanel Style

 Hello!

I wanted to have another Chanel style jacket, after the success of my first one, and I bought this black wool at Linton. But then I changed my mind and decided to use it for my mother in law, Teresa. She deserves it!
I followed a mix of advice from Shaeffer and Kalhje: silk organza as interfacing, silk lining, some fusible interlining for buttonholes. 
First of all, I decided to use Claire Shaeffer's pattern for Vogue. I have her book on jacket construction, and I did not feel like drawing the pattern myself. Ignorant me thought a commercial pattern would be better. WRONG. In the first place, the sizes are too big, so I directly made a size down than Teresa's measures indicated (Ralph Rucci's coat experience).
 After the muslin fitting and adjustments done, I still don't like the sleeve heads, the side panel is ridiculously small, sleeves are very short and I hate the buttons placement in the front and the sleeves. It was 25 euros for nothing. 


Well, after the first mistake (acknowledged), I went on to cut the organza pieces using the slightly modified muslin pieces. And then I used the organza pieces to cut the fabric pieces themselves. I learnt this method in Susan Kahlje's course in Crafsy. It consists of machine sewing the interlining organza to the fabric, aiming to mark it and to prevent it from shape shifting. I used a pale colour organza to make it easy on my eyes.
When I had all the pieces attached to their interlining, I started to baste the pieces together for the first (real fabric) fitting, which proved the sleeves where too short and poorly shaped at the back. I tried to repair that by moving them inwards in their back part. I also made a modification for a curved back that consisted on a dart in the center of the neck (interlining), eased with the iron in the fabric.


After assembling the sleeves, with opening and buttonholes, I applied the silk lining and finished it completely, sewing it by hand all around the bottom of the sleeve and the last remaining seam.


In this last picture we can also see how I quilted the sleeves to the lining, as characteristical in Chanel jackets. Then I basted the sleeves to the jacket and made all the modifications fitting the jacket to the model. I finally sew the sleeves permanently by hand back stitching them. 
The next step was basting all the hem, which goes around the neck, front and bottom of the jacket. 


Once basted, I proceeded to hand sew it with a feltstitch. I also secured the seam allowances open here and there, to prevent them from messing up.
All this with a good pressing every now and then.


In this pic we can see the use of shoulder pads, and sleeve heads (as explained in this Thread's video). I do not see any dramatic improvement with the last.


I decided to make the buttonholes by machine. In the lining, I made coat buttonholes calculating precisely where they went.
Finally I machine sewed all the lining pieces, and pinned them to the jacket as it stood in the mannequin wrong side up. I made a major change here regarding Shaeffer's method (and classic Chanel): I did not quilt the lining to the fabric. I thought the stitching wouldn't look nice in the black wool fabric, and I also dreaded the days and days of delicate hand sewing that this method requires. So, I made a feltsitch to secure it to the jacket, removed all the bastings and...  voliĆ”!


Tuesday, January 14, 2014

Cadena

Recently I have been looking into the different fabric sources I have where I live (180 km. from Barcelona). Karen, the blogger behind Did You Make That? published an article where she shared her best options living in London. I would like to share a Spanish fabric company I love, Cadena. It is expensive (very expensive) but the quality of their fabrics is top, and their designs as well. 
Here you have their website in English: I recommend you to click on "BOOK," for some inspiration. The designs are created and executed by Spanish professional dressmakers, and the results are amazing. You can find this catalogue in any atelier, they use it for inspiration to make clothes for their clients. I've always admired their ability to choose a design in a catalogue like this, and be able to draw a pattern to reproduce it, choose the wonderful fabric to imitate it, and make money out of it!


Monday, January 6, 2014

Cowgirl Shirt Dress


Hello! This is my last creation. I had been wanting a long shirt for some time now. It might seem an absurdity, but I like it! I decided to use a commercial pattern this time. It is a Burda pattern for a normal length shirt, which I simply made longer. Where I live, in Catalonia, we buy "pattern magazines," which can have 15 to 20 patterns in multiple sizes, for a total price of 4 or 5 euros. It is a good deal if you only use one of the patterns of the magazine, and then save it for future projects. Sometimes, I buy a magazine only for one pattern, and then when I am looking for some dress or blouse or whatever I want to make, I look at all my magazine collection and select a few suitable patterns, until I choose the one I like best. We buy a magazine almost every month, and just collect them. We have Patrones, Spanish, and Burda, from Germany.
 

As I have explained in previous projects, I prefer to draw my own patterns now that I know how to do it. They are far better than commercial ones, specially for tight clothes. But in this case, which required a lot of ease, I decided to use a model from Burda. It was perfect at first fitting, I did not have to modify anything. And of course, this is faster than drawing the block, all the special details, like neck, cuffs, yoke, etc.
In general, Burda has great patterns. You can observe how sleeves fit perfectly.


As I always do with shirts, I made all the seams encased in themselves, except the ones in the yoke that are encased inside it. Here I am wearing it with my Timberlands, which are beautiful, comfortable, warm and waterproof: just perfect.


In this close shot you can see the details, and the clip buttons, which are super fun to apply.