Monday, January 6, 2014

Cowgirl Shirt Dress


Hello! This is my last creation. I had been wanting a long shirt for some time now. It might seem an absurdity, but I like it! I decided to use a commercial pattern this time. It is a Burda pattern for a normal length shirt, which I simply made longer. Where I live, in Catalonia, we buy "pattern magazines," which can have 15 to 20 patterns in multiple sizes, for a total price of 4 or 5 euros. It is a good deal if you only use one of the patterns of the magazine, and then save it for future projects. Sometimes, I buy a magazine only for one pattern, and then when I am looking for some dress or blouse or whatever I want to make, I look at all my magazine collection and select a few suitable patterns, until I choose the one I like best. We buy a magazine almost every month, and just collect them. We have Patrones, Spanish, and Burda, from Germany.
 

As I have explained in previous projects, I prefer to draw my own patterns now that I know how to do it. They are far better than commercial ones, specially for tight clothes. But in this case, which required a lot of ease, I decided to use a model from Burda. It was perfect at first fitting, I did not have to modify anything. And of course, this is faster than drawing the block, all the special details, like neck, cuffs, yoke, etc.
In general, Burda has great patterns. You can observe how sleeves fit perfectly.


As I always do with shirts, I made all the seams encased in themselves, except the ones in the yoke that are encased inside it. Here I am wearing it with my Timberlands, which are beautiful, comfortable, warm and waterproof: just perfect.


In this close shot you can see the details, and the clip buttons, which are super fun to apply.

Sunday, December 29, 2013

A Love Story

It probably was Gertie's post on her sewing machine that got me into wanting a Bernina 1008.


The machine I have now, it is not up to my requirements, to say the least. It is not to be trusted. I have some compromised projects put aside waiting for a better tool to sew them. Gerthie's defence of her machine, after some time of using it, is consistent with all the opinions, virtual and in the flesh, I have managed to listen to in the last weeks. So, this is the machine I would like to sew with. 
I am in a mission now!
UPDATE: yesterday I was in a shop to have a real look at it ant try it. The machine is ugly, that was the first impression, it looks like 50 years ago. Compared to the digital ones, this mechanical one, is sturdier, and more powerful. It has a 105 CV motor, and sews super thick fabrics like nothing. It's quite heavy, since it's all metallic (digital ones are plastic), but easy to move and store away if the space requires dismantling after sewing. The number of different stitches is limited, but probably enough. I missed the triple zig zag my machine does, and an elastic straight stitch for jersey with open seams. The light is yellow, as opposed to white led in the digital ones. It is superfast, and I tried a buttonhole too, which was quite nice, although you have only one possible model. 
So now I am in reflection mode, before I decide to spend my money.
Anyone has an opinion?

Tuesday, December 24, 2013

Blue Velvet Dress


This is another fabric I bought in Denmark this summer in Stoff 2000. It's a pitty they don't have an English version of their website to buy some more, because the fabrics they had in the store were original and very nice. In this case, we are talking about some striped jersey velvet, perfect fot a confortable and informal winter dress. 
I used my "Universal Dress" pattern, which I made from the "universal T-shirt" pattern, from Patrones magazine. I baptized it like that becasue of the number of times I have used this pattern. I love the raglan sleeves, which are a perfect option for jersey or knit projects like this one. 


I decided to add a hood, which pattern I drew using Aldrich's book. I used some blue jersey to make the inside of the hood and the facing of the neck opening.
Important to mention is the effort one has to make to marry the stripes in the lateral seams and in the sleeve seams.


After the first fitting, I only had to modify the waist of the dress, entering it 1 cm, and then opening the side seams another cm, making thus a more gracious skirt.


I am really happy with the outcome. It is a perfect marriage of fabric and pattern. The only drawback, is that you end up with a very dirty sewing room after sewing with this velvet fabric, whick produces inmense quantities of fluff. Once the dress is finished, its seams binded with a good zig-zag, and washed, the fluff is gone. But I had my vacuum cleaner next to me for the whole project!


Saturday, November 16, 2013

White Leather Bag

Past summer I enrolled Don Morin's course in Craftsy: Making Leather Bags. I am thrilled about everything I learnt! Did you know that only with some supplies we can sew leather at home, with our domestic machine? Let me explain you about it...
 I didn't like the pattern Don was offering, so I made my own pattern and tried to apply everything I had learnt during the course. My experience with Craftsy online courses is that it is better to watch them while sewing something easy, and start the project once I have watched the whole course.
I found some cheap goat leather in the internet. We can find leather bargains in the internet, specially small pieces.
To start, I bought all the tools I was going to need to complete my project. A self-healing mat, a rotary cutter, a Teflon foot, hand and machine sewing needles special for leather, double sided mounting tape, and since I couldn't find the cold rubber tape Don was using, I substituted it for some surgical tape (made of clothing, it performs the function of preventing leather form stretching when sewn):

As Don recommended, I started by doing a mock up bag in felt. It proved to be helpful, because I changed the measures, and then used it as pattern to cut the lining and leather.


Secondly I proceeded to cut the lining and its interfacing:


Then I made a zipper pocket with its bag, and on the opposite side, I sew a rectangle and divided it into two pockets for phone, etc.


I reserved the lining for later. I cut the leather on the self-healing mat with the rotary cutter. I practiced with some scraps first, and I missed some metal ruler, but I got quite nice cut pieces at the end.
The first thing I sewed was the handles. I put some felt inside for them to be thicker. It took some essay and error to adjust my machine to make good stitches with the thick nylon thread I used, but I managed to do an acceptable job after all:


 Then I put the surgical tape all around the pieces of the bag, and applied the double-sided mounting tape on top of it before sewing two pieces together. Since we cannot use pins or basting with leather, we put the two pieces to be sewn together with this tape. Avoid putting it in the needle's path, we don't want the glue stuck in in the needle.


I sewed the two lateral pieces, stoping in every corner, then taking the thread to one side and knotting them up, since we cannot go backwards with the machine when sewing leather.
I measured the complete lenght of the bag opening and then finished the lining (with mitered corners) and its leather belt on top, which had to be the same lenght as the bag opening. I attached some magnetic fastener in the middle of this leather piece. I sewed one side at a time, previously applying double sided tape, and knotting the treads together after sewing each of the four sides:


And this is the final result. It is a lovely white leather bag, just as I had imagined it, but winter has come, and this project, planned in summer, will have to wait in my wardrbe for the sunny months ahead: 


Tuesday, October 22, 2013

Pink-Trimmed Black Dress


Eva Hache was the inspiration for this project. I had some elastic cotton in my stash waiting to become a classic dress. On the other hand, I had my faboulous Swedish Hasbeens, which are so confortable and so beautifully pink, so it was a total call for me. I found the pink trim and some pink buttons in a sewing supplies store in Lleida, and started to make the dress.
I decided to use the top of my 1958 Simplicity Pattern. This is the third time I use this pattern, it is beautiful and confortable, and fits me like a glove. For the skirt, I had a half cricle skirt planned, but I had not enough fabric for it, so I decided to use my own pattern for the long skirt I made last winter, which was absolutely perfect. I tend to appreciate more and more my own patterns instead of the comercial ones. They are better in all senses. Even in the case of this top, I thought next time I am going to make my own pattern from the "close fitting bodice block" in Aldrich's book. 
A good trick with these two-pieced dresses is to finish the skirt with a waistband, well adjusted and confortable to wear and sit in. Then, we will attach the bodice to that waistband, machine sewing it by the inside. Only then the dress is confortable and stays always in its place, on the waist.
To apply the trim was, not difficult, but laborius to say the least. I learnt in the process that it is better to bast it in place in the good side to the dress first. Second, we will put the facing on top of it, secure it with some pins, and then sew it with the machine on the side of the dress where we can see the basting, and goint just over it. Even thus, one can see the white cotton peeking at some places. But the overall effect is wonderful.
Judge by yourselves:

I even  made the pink trimmed belt, using and old buckle my auntie gave me.


I am in Sitges, in the Fantastic Cinema Festival, my favourite event of the year.


Wednesday, October 16, 2013

Long T-Shirt, Short Dress

I made this simple, but very confortable and practical long top form some jersey fabric I found in a retail store we have in our city, where they sell fabric by weight. This is my favourite shop, mostly because it is cheap, you can touch and feel every fabric, and you get inspired by them. Most of the times, I buy some piece just because is nice, and then I start thinking what could I do with it, like in this example. Although sometimes I like to sew with luxury fabrics, most of the times the principle guiding me is economy. I learn to sew from my mother, and her aim was to save money sewing all the clothes of the family. Nowadays, with very cheap clothes made in countries where the workers are underpaid, we tend to dew for other reasons, but since I grew with it in mind, I still feel well when I manage to get a dress done for 5 Euros. I used the Universal T-Shirt pattern I have used so many times before, which I love for its raglan sleeves, specially suitable for knit or jersey fabrics. It makes a very nice outfit with some leggings for this time of the year.

Thursday, October 3, 2013

Summer Knit Skirt

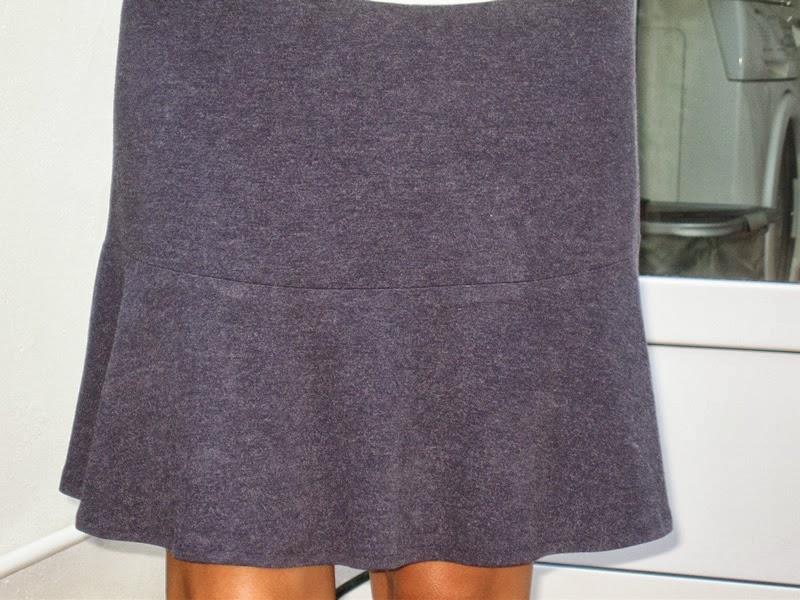
This is a very simple, but very becoming and comfortable jersey skirt.


I made the pattern myself from Aldrich's book, parting from the very simple skirt pattern, in the "Flat Cutting" section of the book. This pattern is for knit fabrics, so it was perfect for this project.
The first modfication I made was to add some flare to the pattern, cutting vertically form the waist dart downwards and moving the dart together.
Then, I cut it in two horizontal parts. I divided the lower part vertically in four rectangles, cuting them all along but leaving the upper tip joined. We will open the lower part of the rectangles giving them a fan shape. I finished the skirt with an ellastic band in the waist. After some small correction in the first fitting (it was 2 cm too big), I finished it in a perfect fit.
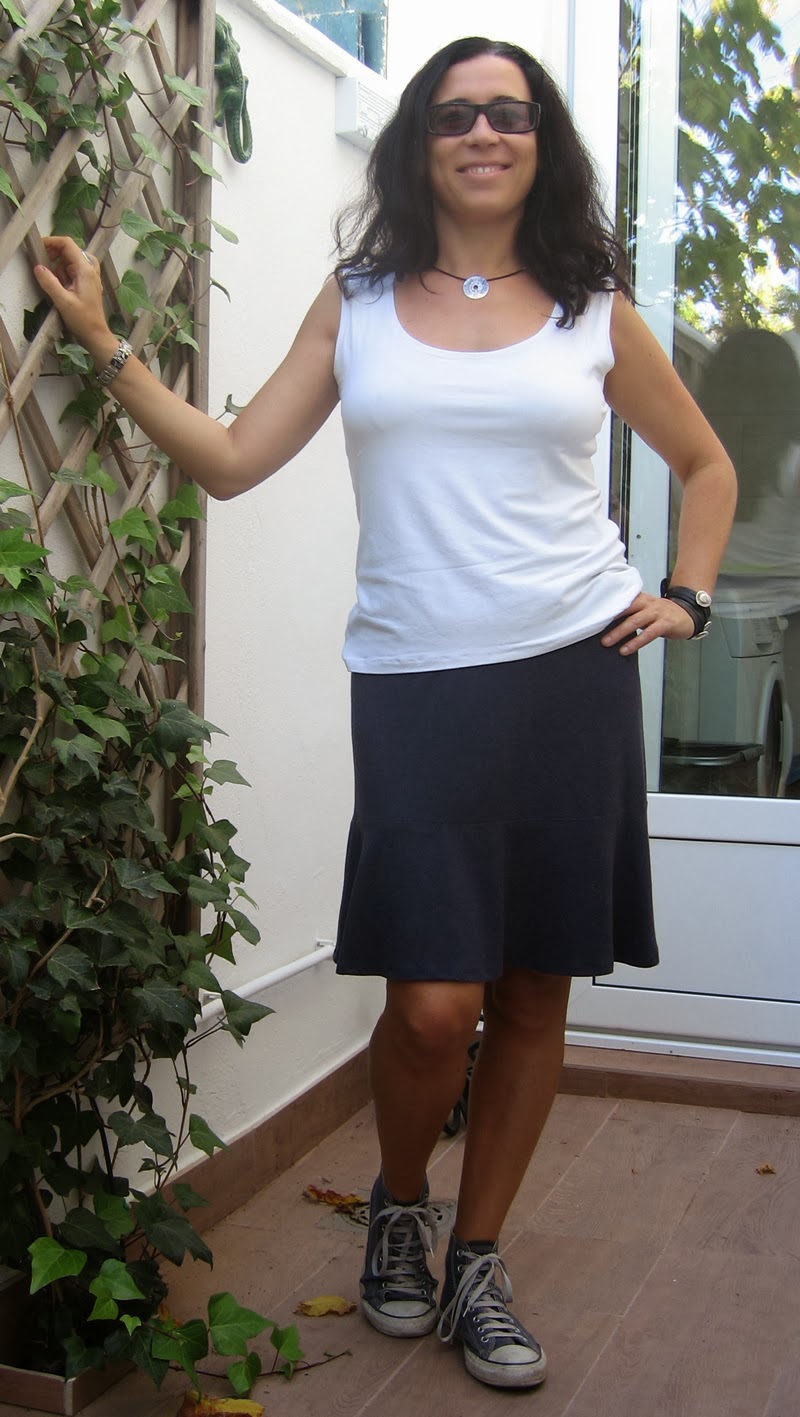
I think it is confortable, sporty, but ellegant at the same time.
Here I am wearing it with my Converse, but wear it with some nice sandals and we'll have a nice formal skirt. I love it!